
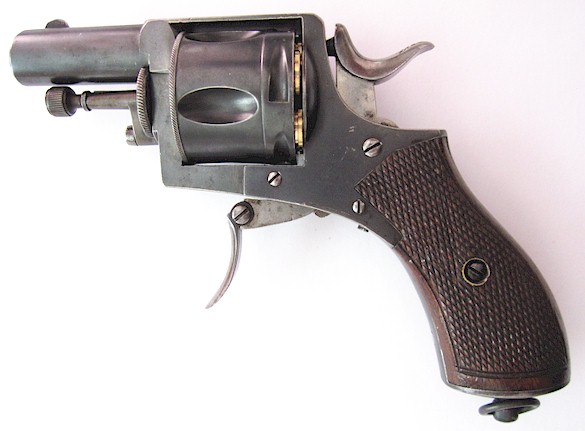
Revive your antique "Bulldog" type revolver in .380 CF short or long
(also known as .38 short or long Colt).
(also known as .38 short or long Colt).

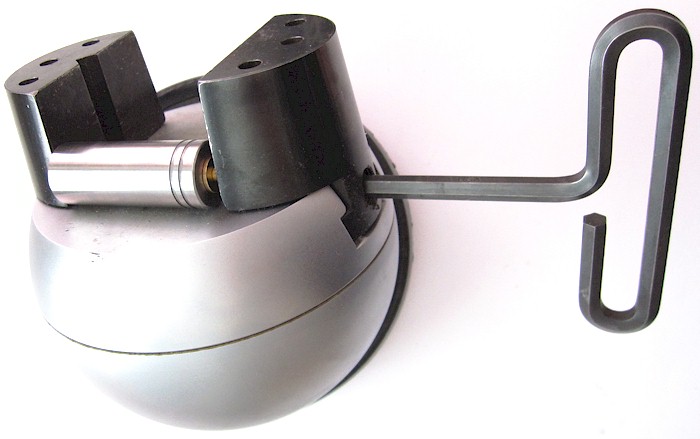
Full Kit for .380 Centerfire Short or Long (.38 Colt)
Content: tools (same for short and long case) + 12 (short or long) reloadable brass cases + 25 round nose bullets + 25 primers (not shipped toward certain countries - without reduction of the kit price). Delivered in a wood box.
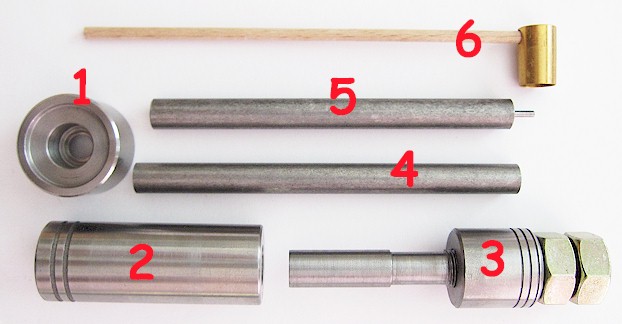
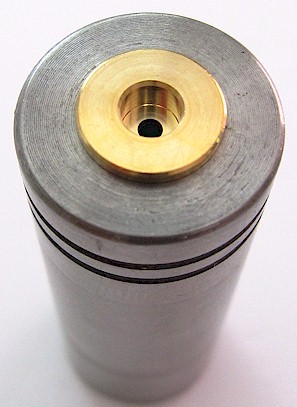
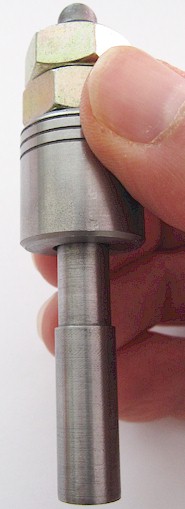
Tools furnished : base (1), Recalibrator (2), Bullet seating rod (3), Pushing rod (4), Primer cap ejector (5), Power measure (6)
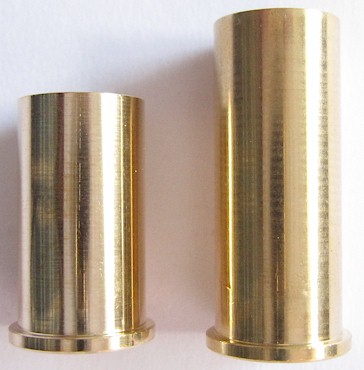
Case and bullet dimensions :
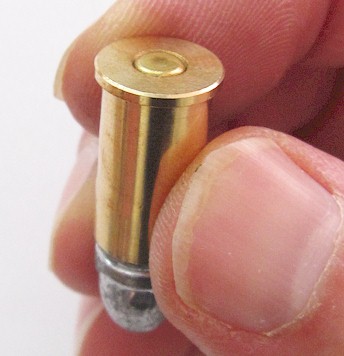
.380 long: Case diam. = .375" - Rim diam. = .430" - case length = .960" - Overall length = 1.390"
.380 short: Case diam. = .375" - Rim diam. = .430" - case length = .700" - Overall length = 1,145"
.380 long: Case diam. = .375" - Rim diam. = .430" - case length = .960" - Overall length = 1.390"
.380 short: Case diam. = .375" - Rim diam. = .430" - case length = .700" - Overall length = 1,145"
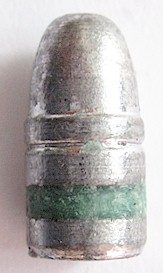
bullet weight : 10 grams (base diam. = .358" - total length .708")
How it does work.
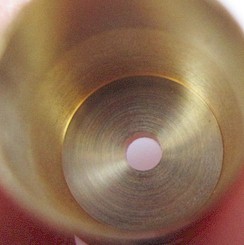
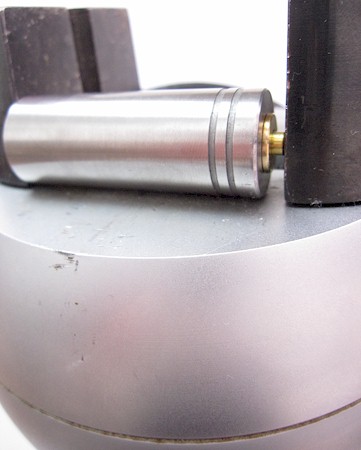
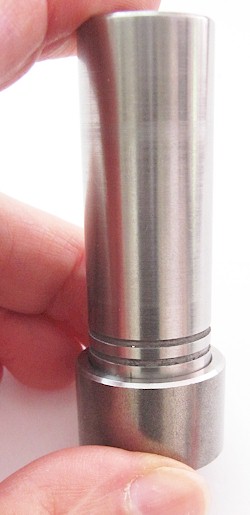
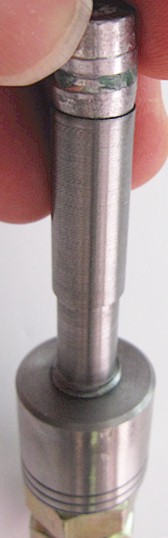
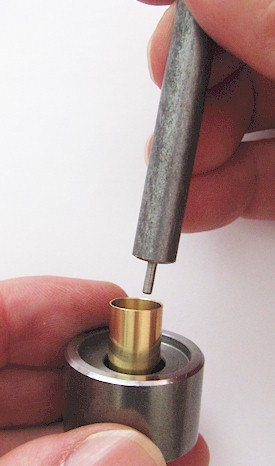
Install the shell upside down in extremity of the recalibrator with two grooves
Position the priming cap (small pistol type) on the case pocket
When the priming cap is positionned on the case pocket, you have to find the most appropriate tool to gently press the cap inside the pocket.
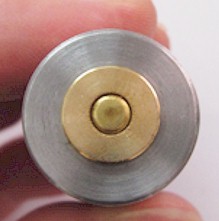
One most easy way is to use a vise (no doubt that an engraving vise, as shown above, is one of the handiest). The whole assembly (recalibrator and cartridge) is positionned between the jaws, and the priming cap is gently forced inside the case pocket through the vise jaws pressure.
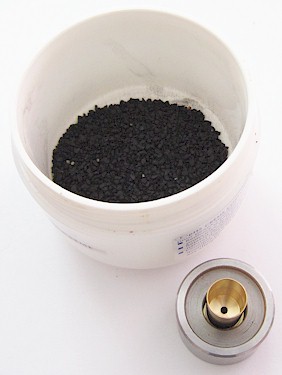
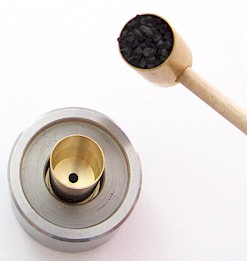
Install the primed case on the base ring as shown above, and fill the case with black powder until reaching the limit of the bullet seating (must be evaluated before). The primer measure furnished with the kit can be used as spoon, but it was not calibrated for the exact quantity.
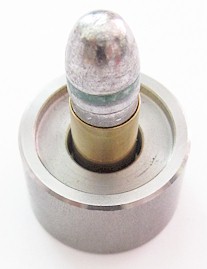
Engage now the base of the lead bullet in the mouth of the loaded case. Try to position the bullet as most vertical as possible to ease the next step.
Put the recalibrator above the base ring so as to surround the cartridge. Notice, that the two external grooves of the recalibrator are below.
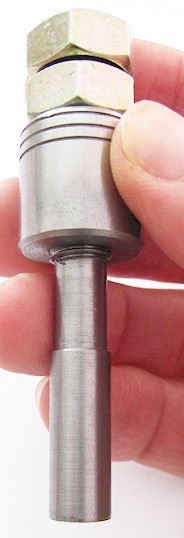
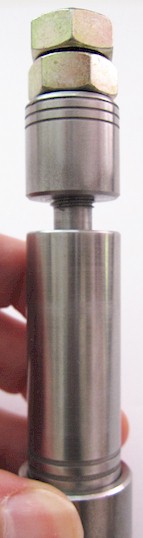
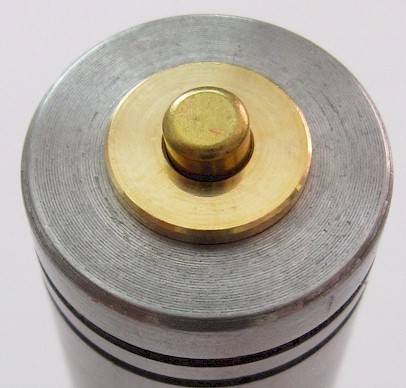
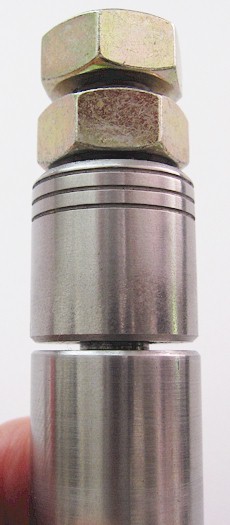
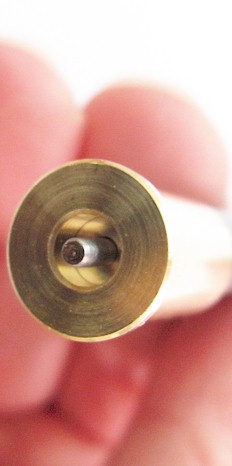
Take now the bullet seating rod, and let it drop inside the recalibrator until it is stopped by the bullet (third picture above). The extremity of the bullet seating rod is hollowed to marry the bullet ogival shape (second picture). The bullet seating rod is fitted with two nuts that will be used to lock the grooved central nut at the correct vertical positioning on the rod, when the first bullet will be properly seated inside the case.
With a nylon mallet strike the seating rod, while verifying from time to time the bullet progression. Stop when perfect seating is reached.
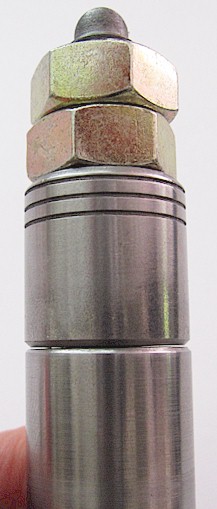
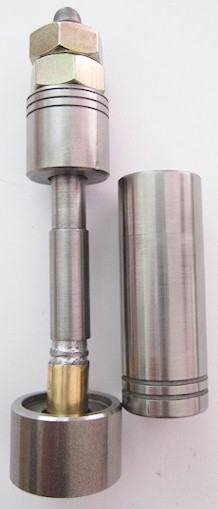
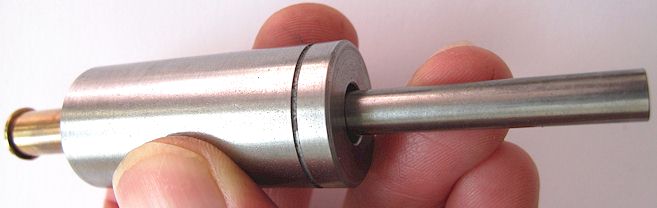
Central cylindrical nut lowered against the recalibrator and locked by the two hexagonal nuts.
When perfect seating of the bullet has been reached, just lower the central grooved nut against the recalibrator (by rotating it clockwise), and lock it using the two standard hexagonal nuts above. The bullet seating rod is then set to the exact length (second image above), and a subsequent seatings will be performed more quickly without verification of the bullet progression inside the case.
You have now one cartridge made, and ready for the shooting range.
After firing
Removal of the crushed primer cap
After firing, in order to re-use the case, the primer must be first removed. This can be done using the short rod with a thinned extremity. The case is positionned on the base ring, and the decapping rod is introduced inside the case. The thin extremity bears against the inner face of the primer cap. You have just to tap in the rod until the primer is pushed out of the case pocket.


The cartridge case, which is very strong, is generally only very slightly widened by the explosion, and could probably be re-used without resizing. If resizing proves necessary, it can be done using the recalibrator. Clean the case, and lube it at its external face. Then enter it in the extremity opposite to the one with the grooves. Then press the case until totally enclosed in the resizing tool. This should be done more easily using a vise (with padded jaws), but a nylon mallet an also be used.
The pushing out of the resized case can be performed using the intended rod (4) provided in the kit.
Rimfire Reloading
Pinfire Reloading
7mm
9mm
11/12mm
12/16 gauge
7mm
9mm
11/12mm
12/16 gauge
11mm French revolver reloading kit11mm French reloading kit PRICE LIST
Ammunition reloading supplies & equipment We produce the widest array of automated reloading tools & kits in competitive prices for your reloading needs.
ReplyDelete